Register authentication tool
Register authentication tool
The principle is that users register and use all authentication tools themselves.
When a user registers an authentication tool, it is called enrollment (Enrollment).
When a user is created for the first time, only the Email OTP is automatically registered using the email information from the user data.
The remaining information can be directly registered and used by the user as needed.
There are three ways to register.
- Login screen > ID/Password input > authentication method select and register on the screen
- On the authentication method selection screen, if you click the authentication tool marked Registration Required (V mark), you can register.
- Click the User Portal(after login) > Profile > Authentication Settings > + Add New button to register.
- Register through the registration message link at the bottom of every authentication screen.
- The screen below is an example of an SMS verification screen. * At the bottom, you can click the If you have changed your mobile phone, please register. message to register.
- All authentication codes can be changed via a message at the bottom of the input (Message format: ~ Please register.)
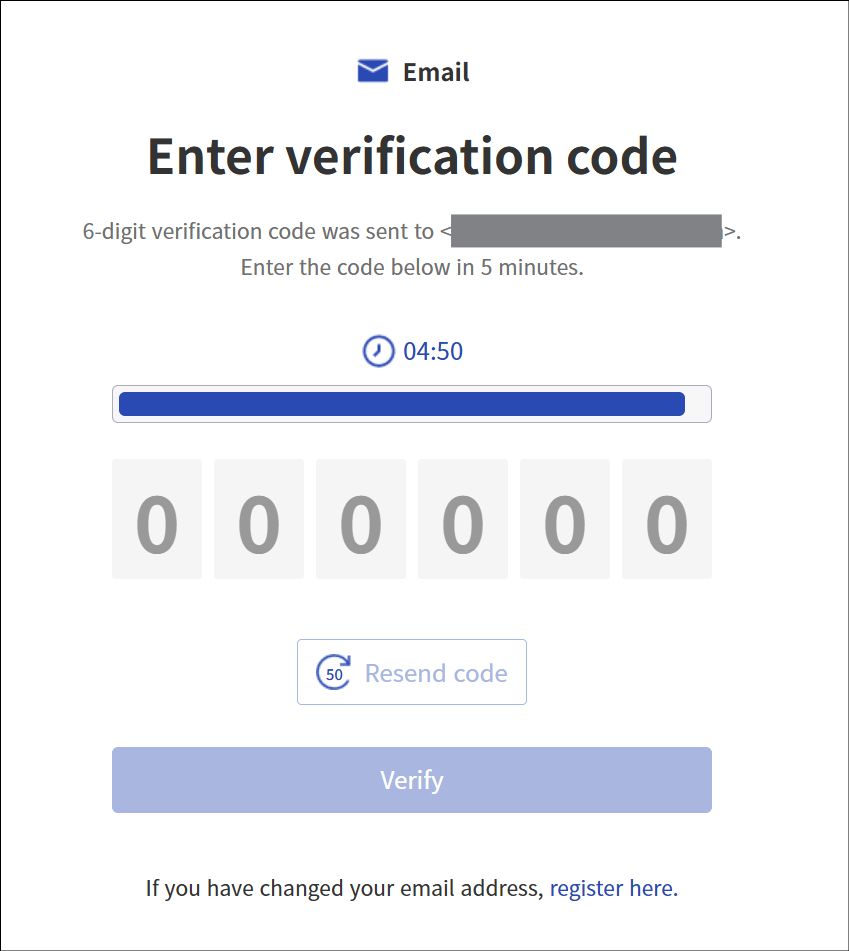
Authentication code input screen example
Register email verification tool
Email registration consists of the following three steps.
- Verification Step: This is the identity verification step before registering the email authentication tool.
- Registration step: This step registers a new email and checks whether the number is valid.
- Completion Stage: This is the stage where you verify that the registration was completed successfully.
Verification step
This is the step of verifying your identity before using the authentication tool. To view the identity verification procedure, please refer to Login using authentication method.
Registration phase
This is the step where the user registers the desired email address and checks its validity.
The user should follow the steps below.
- If you complete identity verification in the Confirmation step, you will automatically move to the Registration step.
- Enter the email address you want to register.
- Click the Send verification code button.
- Check the OTP code sent to the entered email address, and enter the OTP code on the screen.
- If the Authentication code is entered correctly, it proceeds to the Complete stage.
Completion Phase
Registration complete screen appears, and during the next login you can perform first and second authentication using the email verification tool.
Register SMS Authentication Tool
SMS registration consists of the following three steps.
- Verification Step: This is the identity verification step before registering the SMS authentication tool.
- Registration step: The stage where a new mobile phone number is registered and its validity is checked.
- Completion Stage: This is the stage where you verify that the registration was completed successfully.
Verification step
This is the step of verifying your identity before using the authentication tool. To view the identity verification procedure, please refer to Login using authentication method.
Registration Phase
This step registers the mobile phone number the user wants to add and checks its validity.
The user should proceed with the following steps.
- If you complete identity verification in the Confirmation step, you will automatically proceed to the Registration step.
- Select the Country code, and enter the mobile phone number you want to register.
- Click the Send verification code button.
- Check the OTP code sent to the entered mobile phone number, and enter the OTP code on the screen.
- If the Authentication code is entered correctly, it proceeds to the Complete stage.
Completion Phase
Registration Complete screen will appear, and on the next login you can perform first and second factor authentication using the SMS authentication tool.
Register Knox Messenger authentication tool
Knox Messenger registration consists of the following three steps.
- Verification Step: This is the identity verification step before registering the Knox Messenger authentication tool.
- Registration Step: Enter the Knox ID to register. 2. This is the step that checks whether the Knox ID to be registered is valid.
- Completion Stage: This is the stage where you verify that the registration was completed successfully.
Check step
This is the step of verifying your identity before using the authentication tool. To view the identity verification process, refer to Login using authentication method.
Registration stage
This step registers the mobile phone number the user wants to add and checks its validity.
The user should follow the steps below.
- If you complete identity verification in the Verification step, you will automatically proceed to the Registration step.
- Enter the Knox ID to register.
- Click the Send verification code button.
- Check the OTP code sent to Knox Messenger of the entered Knox ID, and enter the OTP code on the screen.
- If the Authentication code is entered correctly, it proceeds to the Complete stage.
Completion Phase
Registration Complete screen will appear, and on the next login you can perform first and second factor authentication using the Knox Messenger authentication tool.
Register Passkey authentication tool
SingleID Passkey consists of the following three steps.
- Verification stage: This is the identity verification step before registering the Passkey authentication tool.
- Registration Stage: This is the Passkey registration stage.
- Completion Stage: This is the step where you confirm that the registration was successful.
Check step
This is the step of identity verification before using the authentication tool. To view the identity verification process, refer to Log in using authentication method.
Registration Phase
This is the step to verify the mobile phone or PC environment where you want to register a Passkey.
Follow the four steps below to complete the registration process.
- Activation: Passkey support environment guide.
- Verification: Complete identity verification using an authentication method.
- Registration: Passkey registration step. 3. When the Generate on this device button is clicked, a Passkey is created and registered on the PC. 3. Create on another device When the button is clicked, it registers with a mobile phone or hardware security key.
- Completed: This step verifies that Registration Complete. 4. Click the Continue button.
Passkey Support Environment
- Operating system (laptop or desktop)
- Windows 11, macOS Ventura, ChromeOS 109 or later
- Mobile phone: iOS 16 or Android 9 or later
- Hardware security key: a hardware security key that supports the FIDO2 protocol
- Browser version
- Chrome 109 or later
- Safari 16 or later
- Edge 109
- Device Settings
- Enable Bluetooth
- Set screen lock password
- Register PIN code
- Allow fingerprint or facial recognition
Completion Phase
After the Passkey registration is completed, the Registration Complete screen appears. You can perform first- and second-factor authentication with the Passky authentication tool on the next login.
PC Passkey requires that Windows Hello be configured in advance. For detailed information, see the reference link.
When registering a Passkey on mobile, you can set it in an environment where QR code scanning is possible.
How to Register PC Passkey
This guide explains how to register a Passkey using Windows Hello on a PC. Passkey requires that Windows Hello be configured in advance. For detailed information, see the Windows Hello Settings.
If you have completed registering a fingerprint or PIN code in Windows Hello settings. Follow the steps below.
- Click User Portal > Profile > Authentication Settings.
- Click the Add New button.

- On the Select registration authentication method screen, select Passkey.
- Passkey registration screen appears. 4. Click Start.

- Passkey supported environment The screen appears. 5. Check the supported operating system version and click the Next button.

- Select verification method The screen appears. 6. Complete verification using an authentication method that can verify your identity.
- Passkey Registration The screen appears. 7. Click the Generate on this device button. (Generate Passkey on Windows PC)

- (If a fingerprint or PIN is set in Windows Hello) Fingerprint or PIN entry authentication screen appears.

- When you enter a fingerprint or PIN code, the registration complete screen appears.

Mobile Passkey Registration Method
This is a guide on registering a mobile Passkey. The mobile Passkey requires the preconfiguration below to be completed beforehand.
- Enable Bluetooth
- Set screen lock password
- Register PIN code
- Allow fingerprint or facial recognition
If you have completed registering the Passkey via mobile. Follow the steps below.
- Click User Portal > Profile > Authentication Settings.
- Click the Add New button.
- Select registration authentication method on the screen, select Passkey.
- Passkey Registration The screen appears. 4. Click Start.
- Passkey supported environment screen appears. 5. Check the supported operating system version and click the Next button.
- Select verification method screen appears. 6. Complete verification using an authentication method that can verify your identity.
- Passkey Registration The screen appears. 7. Create on another device button, click it. (Android or iOS)
- The QR code appears on the screen. 8. Scan the QR code to generate a Passkey on your mobile.

- When you enter a fingerprint or PIN code on the mobile device, the Registration Complete screen appears.
Mobile Passkey Support Scope
- Andriod : Supports Samsung Pass, Google Passkey Manager.
- iOS: Supports Passkey based on iCloud Keychain.
SingleID Authenticator Register authentication tool
The SingleID Authenticator is an authentication tool provided for the SingleID service.
SingleID Authenticator enrollment consists of the following four steps.
- Verification step: This is the identity verification step before registering the SingleID Authenticator authentication tool.
- Installation Step: This is the guide step for the user’s SingleID installation.
- Registration Stage: This step registers a new mobile app and registers the service.
- Completion Stage: This is the stage where you verify that the registration was completed successfully.
Check step
This is the step of verifying your identity before using the authentication tool. To view the identity verification process, refer to Login using authentication method.
Installation Steps
There are three main ways to install the SingleID mobile app.
- How to install SingleID Authenticator by scanning a QR code on the user’s mobile or searching for “SinlgeID” on Google Play Store (Android) or App Store (iOS).
- How to install by entering your mobile phone number and receiving the download link via SMS
- How to install via a manual download link Install the SingleID Authenticator app and click the Next button to proceed to the registration step.
Registration stage
Install the SingleID Authenticator mobile app on the mobile phone you wish to register, then launch SingleID Authenticator.
Complete the registration process in the three steps below.
- Service Registration: In the SingleID Authenticator app, click the ‘+’ at the top.
- Enter QR or authentication number: Scan the QR code or enter the authentication code to register.
- Service registration complete: Click the Confirm button to complete the registration.
Completion Phase
After registration is completed in SingleID Authenticator, the Registration Complete screen appears. You can perform first- and second-factor authentication with the Windows Hello authentication tool on the next login.
Register TOTP Authenticator tool
TOTP Authenticator registers third‑party TOTP to support various authentication tools.
TOTP Authenticator enrollment consists of the following four steps.
- Verification step: This is the identity verification step before registering the SingleID Authenticator authentication tool.
- Installation Step: This is the user’s SingleID installation guide step.
- Registration Stage: This step involves registering a new mobile app and registering the service.
- Completion Stage: This is the stage where you verify that the registration was completed successfully.
Check step
This is the step of verifying your identity before using the authentication tool. To view the identity verification process, refer to Login using authentication method.
Installation Steps
There are two main ways to install the TOTP Authenticator.
- Mobile app
- Web browser extension
Click the Next button to go to the registration step.
Service Registration and Verification Phase
This step registers and verifies the 3rd‑party TOTP authenticator you are adding.
Complete the registration process in the two steps below.
- Service Registration: Scan the QR code of the TOTP Authenticator you want to register, or enter the manual code. 1. The code registration is completed in the TOTP mobile app or extension.
- Service Verification: Run the TOTP mobile app or extension, and enter the OTP.
TOTP Authenticator support SingleID supports a variety of standardized 3rd‑party TOTP authentication apps. Non-standard TOTP is not supported. The verified mobile and extension programs are as follows. We recommend the mobile app or extension below.
- Mobile app
- Google Authenticator, Microsoft Authenticator
- Web browser extension
- TOTP extension searchable in the Chrome Web Store and Microsoft Edge Add-ons
Completion Phase
After registration is completed in SingleID Authenticator, the Registration Complete screen appears. You can perform first and second factor authentication using the TOTP Authenticator tool on the next login.
Administrator authentication
Authenticate
In the SingleID service, the administrator provides authentication by delegating identity verification on behalf of the user.
To perform administrator authentication, follow the steps below.
- At the bottom of the screen in the Identity verification selection method, “If you cannot complete identity verification, you can request verification from the administrator.” 1. Click here.
- Click the Request button.
- You will be taken to the admin selection screen. 3. Select the administrator who requested authentication delegation and click the Request button.
- Authentication delegation is requested for the selected administrator.
- When the administrator approves the authentication delegation, it is completed automatically.