CAM Portal
Overview
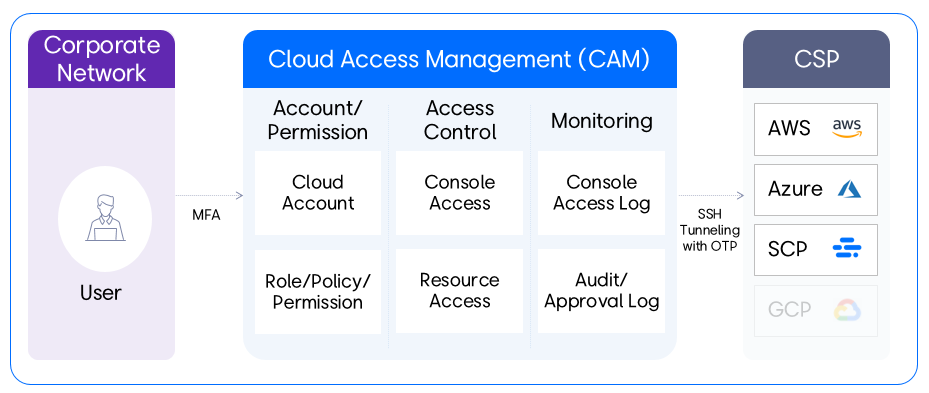
CAM (Cloud Access Management) is a service for managing cloud console and resource access, providing users with easy and convenient access to cloud consoles and resources.
Users can access the portal from a PC located on the company network through multi-factor authentication. Instead of using a password, a one-time token is issued to access the cloud consoles and resources, and all console access history, activity history, and approval history can be monitored.
Service Scenario
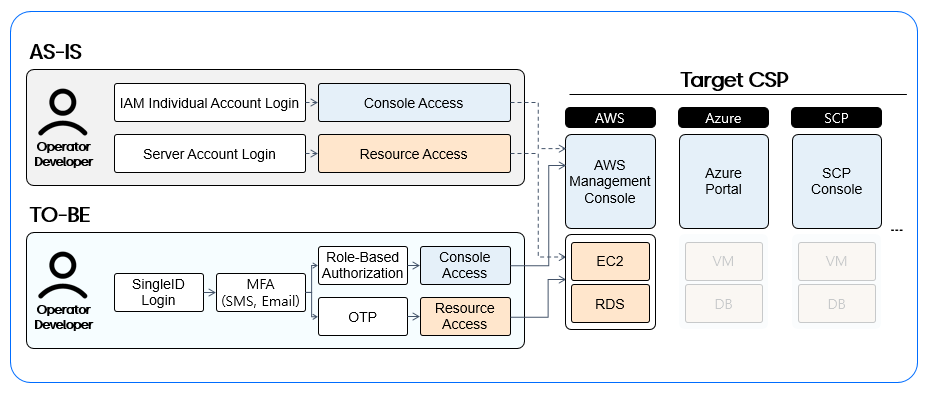
In the past, users accessed the console and resources directly with their IAM personal accounts, but now CAM provides a unified access channel.
- Step 1: During the transition period, the TO-BE access channel is newly configured and operated in parallel with the AS-IS access channel.
- Step 2: After the Cut-Over, the AS-IS access channel is blocked, and the TO-BE channel is switched.
Key Features
User Scenario
The user scenario proceeds in the following order:
- Sign-In → Basic Information Setting → Console Access Control → Resource Access Control → Monitoring

Login & Home
Users log in with their SingleID or SSO account (e.g., Knox Portal) and proceed with multi-factor authentication. After entering the authentication code received via SMS or email, the login process is completed and access to CAM is granted.

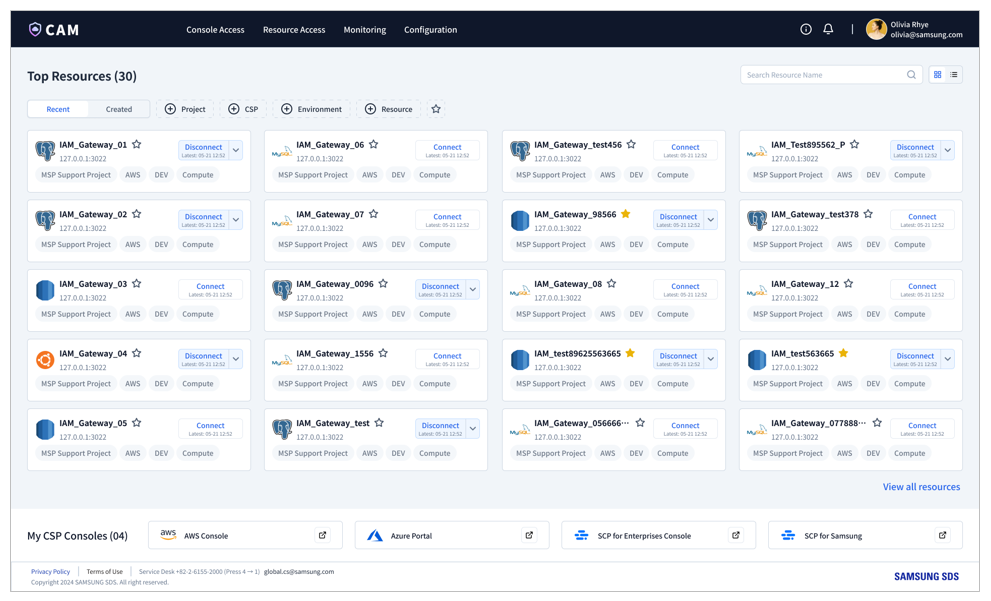
The home screen provides a personalized screen that allows users to access cloud consoles and resources with one click, making it easy for users to access consoles and resources.
Configuration
After creating a project, users can easily register their CSP (Cloud Service Provider) account. Additionally, users can be added to the project to provide project-specific permissions.
Console Access
Roles and policies can be created to set and control access permissions to the cloud console. Roles can be mapped to specific accounts and users, defining which users can access the CSP console and their permission levels.
Resource Access
Cloud resource access permissions are managed. To manage cloud resource access, users first request permissions, download and install the PC client agent, and register their access IP address. Once set up, users can access their desired resources from their personalized resource list.