Kubeflow Usage Guide
Below, we guide you on how to use Kubeflow after creating it.
Add Kubeflow User
Below is a guide on how to use Kubeflow after it has been created.
Kubeflow only creates the account of the single Admin User entered on the initial installation screen.
When using the Kubeflow Dashboard, to add users other than the initial user, you must modify the settings of Dex (the authentication integration component of Kubeflow).
- Dex is deployed in the auth namespace, and its configuration is stored in a configmap named dex.
The following is an example of Dex configuration.
apiVersion: v1
kind: ConfigMap
metadata:
  name: dex
  namespace: auth
data:
  config.yaml: |
    issuer: http://dex.auth.svc.cluster.local:5556/dex
    storage:
      type: kubernetes
      config:
        inCluster: true
    web:
      http: 0.0.0.0:5556
    logger:
      level: "debug"
      format: text
    oauth2:
      skipApprovalScreen: true
    enablePasswordDB: true
    staticPasswords:
    - email: admin@kubeflow.org
      hash: $2y$10$Yb9WVbn8pzVSM6fBgKdFae1Bh6Z.XTihi7bNu3sB6/h5bt1JuUOgq
      username: admin
      userID: 9cb67307-fd6d-4441-9b59-52acd78f4c9e
    staticClients:
    - id: kubeflow-oidc-authservice
      redirectURIs: ["/login/oidc"]
      name: 'Dex Login Application'
secret: pUBnBOY80SnXgjibTYM9ZWNzY2xreNGQokapiVersion: v1
kind: ConfigMap
metadata:
name: dex
namespace: auth
data:
config.yaml: |
issuer: http://dex.auth.svc.cluster.local:5556/dex
storage:
type: kubernetes
config:
inCluster: true
web:
http: 0.0.0.0:5556
logger:
level: "debug"
format: text
oauth2:
skipApprovalScreen: true
enablePasswordDB: true
staticPasswords:
- email: admin@kubeflow.org
hash: $2y$10$Yb9WVbn8pzVSM6fBgKdFae1Bh6Z.XTihi7bNu3sB6/h5bt1JuUOgq
username: admin
userID: 9cb67307-fd6d-4441-9b59-52acd78f4c9e
staticClients:
- id: kubeflow-oidc-authservice
redirectURIs: ["/login/oidc"]
name: 'Dex Login Application'
secret: pUBnBOY80SnXgjibTYM9ZWNzY2xreNGQokWhen the enablePasswordDB value in the configuration is true, Dex stores the list of users defined in staticPasswords from the configmap into its internal storage when the service starts. Therefore, by adding new user entries composed of email, hash, username, and userID to staticPasswords, you can freely add users beyond the initial ones and use the Kubeflow service.
The attribute values for adding a user can be defined as follows.
| parameter | Explanation |
|---|---|
| A value in a standard E‑mail format | |
| hash | Bcrypt algorithm encrypted user password value, and you can directly input the hash value generated by the Bcrypt algorithm
|
| username | User name
|
| userID | A uniquely identifiable ID value
|
From a node where you can use kubectl, use the following command to enter the edit screen of dex configmap.
kubectl edit configmap dex -n authkubectl edit configmap dex -n authstaticPasswords:
- email: admin@kubeflow.org
hash: $2y$10$Yb9WVbn8pzVSM6fBgKdFae1Bh6Z.XTihi7bNu3sB6/h5bt1JuUOgq
username: admin
userID: 9cb67307-fd6d-4441-9b59-52acd78f4c9e
- email: sds@samsung.com
hash: $2y$12$0g5.y86jnrt0v6In5NRCZ.YVuvrAUQ6j/RJYO3rV.kNulaDALOKfq
username: sds
userID: 8961d517-3498-4148-90c9-7e442ee91154staticPasswords:
- email: admin@kubeflow.org
hash: $2y$10$Yb9WVbn8pzVSM6fBgKdFae1Bh6Z.XTihi7bNu3sB6/h5bt1JuUOgq
username: admin
userID: 9cb67307-fd6d-4441-9b59-52acd78f4c9e
- email: sds@samsung.com
hash: $2y$12$0g5.y86jnrt0v6In5NRCZ.YVuvrAUQ6j/RJYO3rV.kNulaDALOKfq
username: sds
userID: 8961d517-3498-4148-90c9-7e442ee91154Since the staticPasswords value in the configmap is applied when the Dex service starts, restart the Dex service using the following command.
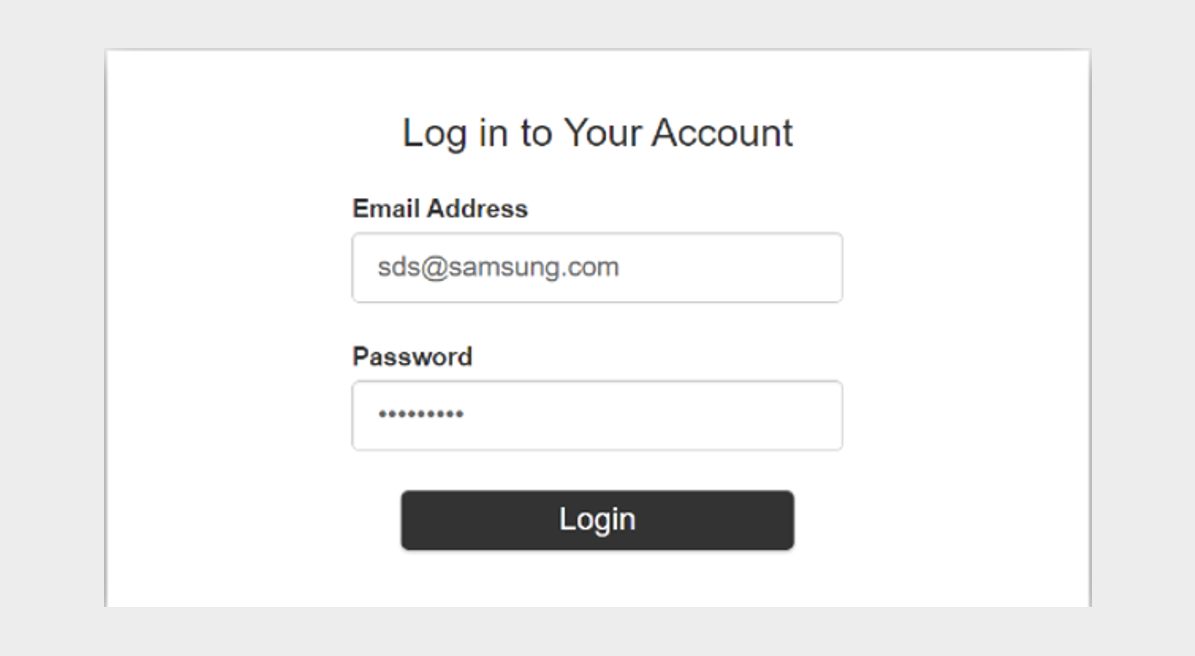
kubectl rollout restart deployment dex -n authkubectl rollout restart deployment dex -n authAttempt to log in using new user information.
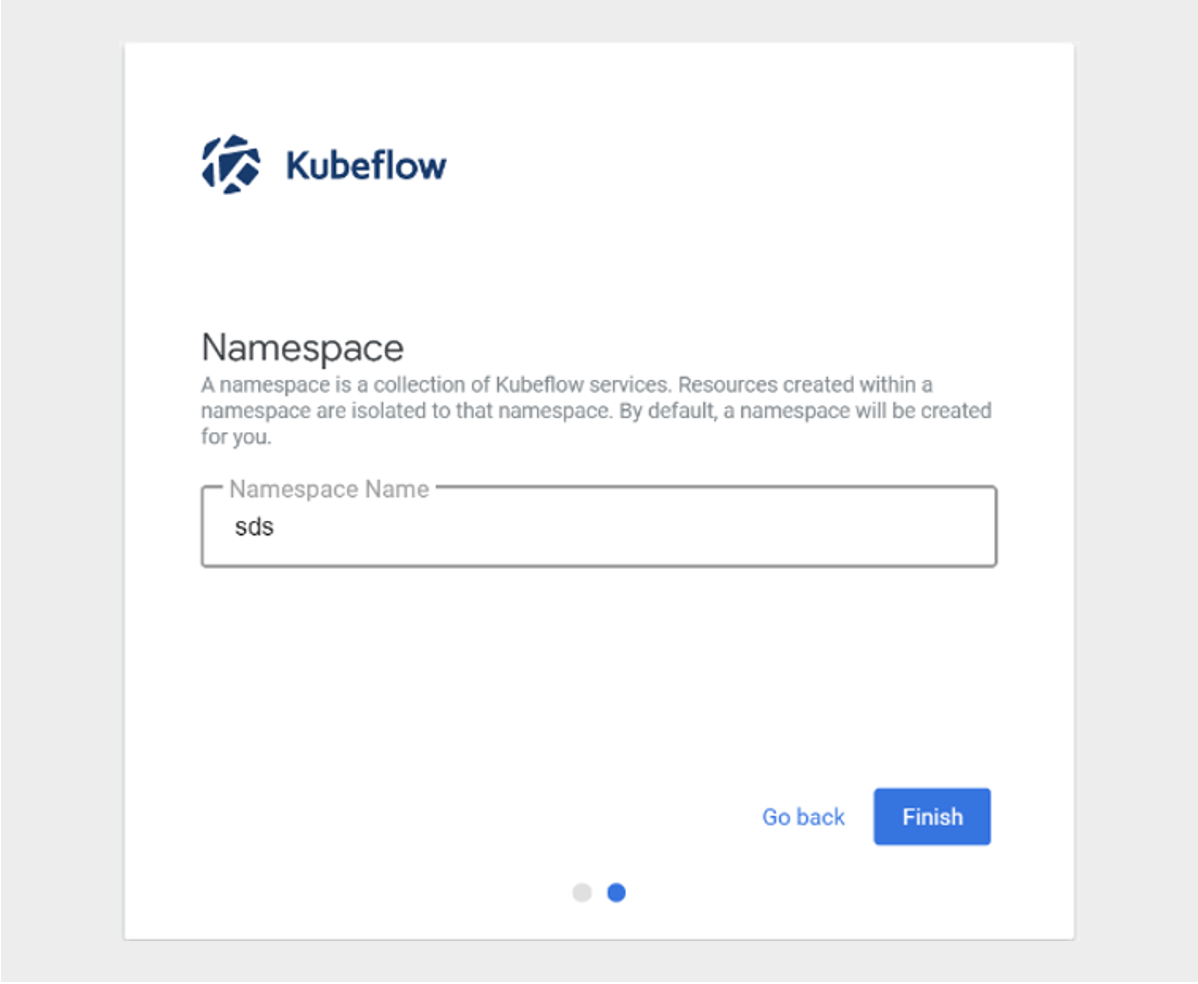
Verify that after successful login, it transitions to the screen for creating a new Namespace(profile).
The above content was written with reference to the official Kubeflow site. For more details, see Kubeflow Profiles.
How to use Custom Image in Kubeflow Jupyter Notebook
To use a custom image in the Kubeflow Notebook Controller that manages the Notebook life cycle of Kubeflow, you must meet several requirements.
Kubeflow assumes that Jupyter will start automatically when a Notebook image is run. Therefore, you need to set the default command to start Jupyter in the container image.
The following is an example of what should be included in a Dockerfile.
ENV NB_PREFIX

CMD ["sh","-c", "jupyter notebook --notebook-dir=/home/${NB_USER} --ip=0.0.0.0 --no-browser --allow-root --port=8888 --NotebookApp.token='' --NotebookApp.password='' --NotebookApp.allow_origin='*' --NotebookApp.base_url=${NB_PREFIX}"]
ENV NB_PREFIX
CMD ["sh","-c", "jupyter notebook --notebook-dir=/home/${NB_USER} --ip=0.0.0.0 --no-browser --allow-root --port=8888 --NotebookApp.token='' --NotebookApp.password='' --NotebookApp.allow_origin='*' --NotebookApp.base_url=${NB_PREFIX}"]The above items are explained as follows.
| parameter | Explanation |
|---|---|
--notebook-dir=/home/jovyan | Set working directory
|
--ip=0.0.0.0 | Allow Jupyter Notebook to accept connections from any IP |
--allow-root | Allow the user to run Jupyter Notebook as root |
--port=8888 | Port configuration |
--NotebookApp.token=’’ –NotebookApp.password=’’ | Disable Jupyter authentication
|
--NotebookApp.allow_origin=’*’ | Allow origin |
--NotebookApp.base_url=NB_PREFIX | Base URL setting |
You can create a Custom Image by referring to the Dockerfile that builds the tesorflow notebook image.
- https://github.com/kubeflow/kubeflow/blob/v1.2.0/components/tensorflow-notebook-image/Dockerfile Please refer to it.
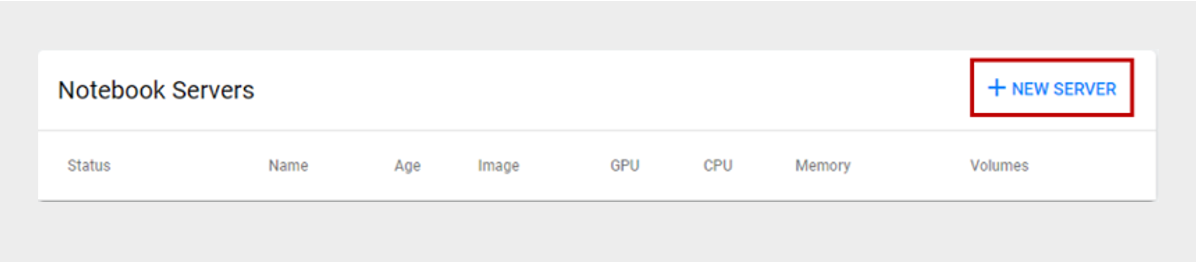
On the Notebook Servers page, click the +NEW SERVER button.
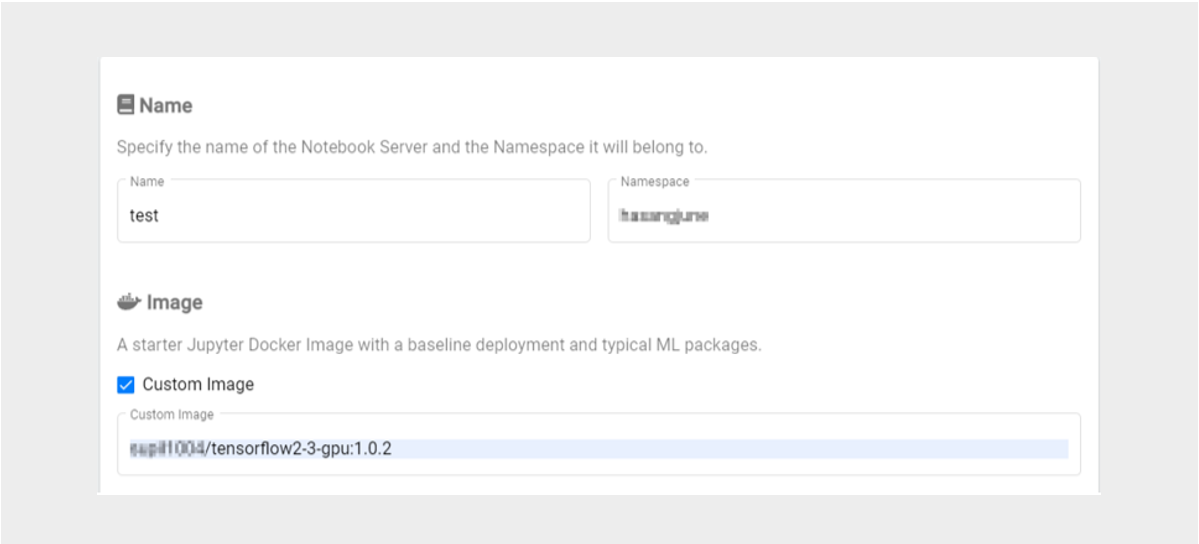
If you have created a Custom Image, check Custom Image on the Kubeflow Notebook Server screen and enter the Custom Image address to create a new Notebook Server.
The above content was written with reference to the Kubeflow official site.
- For more details, see the Kubeflow Notebooks > Container Images documentation on the official Kubeflow website.