Users can create the service by entering the required information for the AI&MLOps Platform and selecting detailed options through the Samsung Cloud Platform Console.
To create an AI&MLOps Platform, follow these steps.
Click the All Services > AI/ML > AI&MLOps Platform menu. You will be taken to the Service Home page of AI&MLOps Platform.
Service Home page, click the AI&MLOps Platform Create button. You will be taken to the AI&MLOps Platform Create page.
On the AI&MLOps Platform creationService Type Selection page, enter the information required to create the service and select detailed options.
Select the service type in the Service Type and Version Selection area.
Category
Required
Detailed description
Service type
Required
Service type selected by the user
AI&MLOps Platform
Kubeflow Mini
Service type version
Required
Select version of the selected service
Provide a list of versions of the offered service
Table. AI&MLOps Platform service types and version selection items
Cluster Deployment Area Classification Select the options required to create a service in this area.
Category
Required
Detailed description
Cluster deployment area
Required
Deploy from Kubernetes Engine: Select the previously created Kubernetes Engine
Deploy to a new cluster: When creating the AI&MLOps Platform, also create a Kubernetes Engine
Table. AI&MLOps Platform Service Cluster Deployment Area Classification Items
Reference
The configuration elements on the following Service Information Input page vary depending on the cluster deployment settings.
On the Service Information Input page of AI&MLOps Platform Creation, enter the information required to create the service and select detailed options.
You can select the cluster deployment region.
For instructions on configuring Deploy to a new cluster, see the Deploy to a new cluster guide.
Refer to the Kubernetes Cluster specifications guide for the Kubernetes cluster specifications required for installation.
On the Creation Information Check page of AI&MLOps Platform creation, review the detailed information you created and the estimated billing amount, and click the Complete button.
Once creation is complete, check the created resources on the AI&MLOps Platform Service List page.
Check detailed information of AI&MLOps Platform
The AI&MLOps Platform service allows you to view and edit the full list of resources and detailed information. AI&MLOps Platform Service Details page consists of Details, Tags, Activity History tabs.
To view detailed information about the AI&MLOps Platform service, follow the steps below.
Click the All Services > AI/ML > AI&MLOps Platform Service menu. Navigate to the Service Home page of the AI&MLOps Platform Service.
On the Service Home page, click the AI&MLOps Platform menu. You will be taken to the AI&MLOps Platform Service List page.
On the AI&MLOps Platform Service List page, click the resource to view detailed information. You will be taken to the AI&MLOps Platform Service Details page.
AI&MLOps Platform Service Details page displays status information and additional feature information, and consists of Details, Tags, Activity History tabs.
Detailed Information
AI&MLOps Platform Service List page lets you view detailed information of the selected resource and edit the information if needed.
Category
Detailed description
service
Service name
Resource Type
Resource Type
SRN
Unique resource ID in Samsung Cloud Platform
Resource name
Resource name
In the AI&MLOps Platform service, it refers to the cluster name
Resource ID
Unique resource ID in the service
constructor
User who created the service
Creation date and time
Service creation date and time
editor
User who edited the service information
Modification date
Date and time the service information was modified
Dashboard status
Dashboard status value
Service name
Service name
Admin Email Address
Administrator email address
image name
Service image name
Version
Image version
Service type
Deployed service type
Table. AI&MLOps Platform Service Detailed Information Items
tag
AI&MLOps Platform Service List page lets you view the tag information of the selected resource, and you can add, modify, or delete it.
Category
Detailed description
Tag list
Tag list
You can view the Key and Value information of the tag
Up to 50 tags can be added per resource
When entering a tag, you can search and select from the list of previously created Keys and Values
Table. Cluster Tag Tab Items
Job History
AI&MLOps Platform Service List page lets you view the operation history of the selected resource.
Category
Detailed description
Task History List
Resource Change History
You can view operation details, operation time, resource type, resource name, operation result, and operator information
Operation History List Click the relevant resource in the list. Operation History Details A popup window will open.
Table. AI&MLOps Platform Service Job History Tab Detailed Information Items
Access AI&MLOps Platform
To access the AI&MLOps Platform dashboard, you must complete the prerequisite steps.
Preliminary work
To access the AI&MLOps Platform, you must preconfigure the relevant ports and the IP addresses required for connection in the Security Group and Firewall (if using a firewall).
Kubeflow Mini: port 31390 (inbound rules of Security Group, VPC firewall)
To access the cluster’s worker node, you must set an inbound rule for port 22 on the Security Group and Firewall (when using a VPC firewall).
Access Dashboard
To access the AI&MLOps Platform service, follow these steps.
Click the All Services > AI/ML > AI&MLOps Platform Service menu. You will be taken to the Service Home page of the AI&MLOps Platform service.
Click the AI&MLOps Platform Service menu on the Service Home page. You will be taken to the AI&MLOps Platform Service List page.
Click the resource to view detailed information on the AI&MLOps Platform Service List page. You will be taken to the AI&MLOps Platform Details page.
AI&MLOps Platform Details on the page, click the Access Guide button. The Access Guide popup window opens.
Access Guide In the popup window, click the dashboard’s URL link. You will be taken to the corresponding dashboard page.
Caution
When using a public subnet and assigning a public IP, you may be exposed to security attacks such as external hacking and malware infection.
Terminate AI&MLOps Platform
You can cancel the unused service to reduce operating costs. However, canceling the service may cause the running service to stop immediately, so you should thoroughly consider the impact of service interruption before proceeding with the cancellation.
Caution
Please note that data cannot be recovered after terminating the service.
To cancel the AI&MLOps Platform, follow the steps below.
Click the All Services > AI/ML > AI&MLOps Platform Service menu. Navigate to the Service Home page of the AI&MLOps Platform Service.
On the Service Home page, click the AI&MLOps Platform Service menu. You will be taken to the AI&MLOps Platform Service List page.
Click the resource to view detailed information on the AI&MLOps Platform Service List page. You will be taken to the AI&MLOps Platform Details page.
AI&MLOps Platform Details on the page, click the Cancel Service button. The Cancel Service popup will open.
After entering the service name for verification, click Confirm.
When termination is complete, check on the AI&MLOps Platform Service List page whether the resource has been terminated.
1 - Cluster deployment
Cluster deployment area
Samsung Cloud Platform offers two cloud deployment regions in the AI&MLOps Platform creation’s service type selection.
Depending on the selection of the cluster deployment region, the installation details on the AI&MLOps Platform creationservice information input page differ.
Deploy on SCP Kubernetes Engine
All Services > AI/ML > AI&MLOps Platform Click the menu. 1. Navigate to the Service Home page of the AI&MLOps Platform.
On the Service Home page, click the Create AI&MLOps Platform button. 2. Navigate to the Create AI&MLOps Platform page.
On the Service Type and Version Selection page of AI&MLOps Platform creation, enter the information required to create the service and select detailed options.
Cluster deployment
Please select the Deploy on SCP Kubernetes Engine option.
AI&MLOps Platform Creation’s Service Information Input page: enter the information required to create the service and select detailed options.
Service Information Input area, enter or view the information required to create a service.
구분
Required
Detailed description
Service Name
Required
Enter AI&MLOps Platform name
AI&MLOps Platform name cannot be duplicated within the project
Storage Class
Required
Storage Class is automatically registered
Installation node information
Lookup
Check the node information of the selected Kubernetes Engine
Admin Email Address
Required
Enter the administrator (Admin) email address to use for login
Password
required
Enter the password to use for login
Confirm password
Required
Re-enter the password to prevent password errors
Table. AI&MLOps Platform Service Information Input Items
Additional Information Input area, enter or select the information needed to create the service.
Category
Required
Detailed description
tag
Select
Select tags to add to the AI&MLOps Platform
Click Add Tag to create a new tag or add an existing tag
Up to 50 tags can be registered
The newly added tags are applied after the service creation is completed
Table. AI&MLOps Platform Service Additional Information Input Items
Deploy to a new cluster
All Services > AI/ML > AI&MLOps Platform Click the menu. 1. Navigate to the Service Home page of the AI&MLOps Platform.
On the Service Home page, click the Create AI&MLOps Platform button. 2. Go to the AI&MLOps Platform Creation page.
On the Service Type and Version Selection page of AI&MLOps Platform creation, enter the information required to create the service and select detailed options.
Cluster deployment
Select the Deploy to a new cluster option.
On the Service Information Input page of AI&MLOps Platform creation, enter the information required to create a service and select detailed options.
Service Information Input area, enter or view the information required for service creation.
Category
Required
Detailed description
Service Name
Required
Enter AI&MLOps Platform name
AI&MLOps Platform name cannot be duplicated within a project
Storage Class
Required
Storage Class is automatically registered
Installation node information
Lookup
Check the node information of the selected Kubernetes Engine
Admin Email Address
Required
Enter the administrator (Admin) email address to use for login
Password
Required
Enter the password to use for login
Confirm password
Required
Re-enter the password to prevent password errors
Table. AI&MLOps Platform Service Information Input Items
Kubernetes Engine Information Input Enter or select the required information in the area.
Category
Required status
Detailed description
Cluster name
Required
Cluster name
must start with an English letter and may use English letters, numbers, and special characters (-)
Enter within 3 to 30 characters
Control Plane Settings > Kubernetes Version
required
Select Kubernetes version
Control Area Settings > Control Area Logging
Selection
Select whether to enable control plane logging
Audit/Event logs from the cluster control plane can be viewed in Cloud Monitoring’s log analysis
Each account receives 1 GB of free log storage for all services, and logs exceeding 1 GB are deleted sequentially
Availability Zone: Choose the Availability Zone of the selected VPC
Subnet: Select a standard Subnet to use from the subnets of the selected VPC
Security Group: Click the Search button and then select a Security Group in the Select Security Group popup
Load Balancer: Provides the type:LoadBalancer feature in a Kubernetes Service object
Select a load balancer on the same network
Use: select whether to enable
Cannot be changed after configuration
File Storage Settings
Required
Select the file storage volume to use in the cluster
Default Volume (NFS): Select File Storage via the Search button
Default Volume file storage offers only the NFS format
Table. Kubernetes Engine service information entry items
In the Node Pool Information Input area, enter or select the required information.
Category
Required
Detailed description
Node pool configuration
Required
Select node pool information
* Marked items are required fields, so they must be entered
For the AI&MLOps Platform, image size can continuously increase depending on usage, so setting Block Storage to at least 200GB enables smooth system configuration
Table. AI&MLOps Platform Service Information Input Items
Reference
A Windows OS node pool can be created only when an additional storage (CIFS) volume is in use in the cluster.
Volume encryption for node pool Block Storage can only be set at initial creation.
Enabling encryption may cause performance degradation in some features.
You can enter node count, minimum node count, maximum node count only when you have selected the node pool auto‑scaling or shrinking feature.
In the Additional Information Input area, enter or select the required information.
Category
Required
Detailed description
tag
Select
Select tags to add to the AI&MLOps Platform
Click Add Tag to create a new tag or add an existing tag
Up to 50 tags can be registered
The newly added tags are applied after the service creation is completed
Table. AI&MLOps Platform service information input items
Cluster specifications
To use the AI&MLOps Platform, you need a Kubernetes Engine to install the AI&MLOps Platform. You can select an existing Kubernetes Engine, or create a Kubernetes Engine together when creating the AI&MLOps Platform.
The specifications of the Kubernetes cluster required for installation are as follows.
Node pool resource size (composed of two or more nodes)
AI&MLOps Platform: vCPU 32, Memory 128G or more
Kubeflow Mini: up to vCPU 24, Memory 96G
Kubernetes version
AI&MLOps Platform v1.9.1 (k8s v1.30)
Kubeflow Mini v1.9.1 (k8s v1.30)
Information
Only one AI & MLOps Platform instance can be installed per Kubernetes cluster, and the platform cannot be installed on a cluster that is already being used for other purposes.
2 - Kubeflow Usage Guide
Below, we guide you on how to use Kubeflow after creating it.
Add Kubeflow User
Below is a guide on how to use Kubeflow after it has been created.
Kubeflow only creates the account of the single Admin User entered on the initial installation screen.
When using the Kubeflow Dashboard, to add users other than the initial user, you must modify the settings of Dex (the authentication integration component of Kubeflow).
Dex is deployed in the auth namespace, and its configuration is stored in a configmap named dex.
When the enablePasswordDB value in the configuration is true, Dex stores the list of users defined in staticPasswords from the configmap into its internal storage when the service starts. Therefore, by adding new user entries composed of email, hash, username, and userID to staticPasswords, you can freely add users beyond the initial ones and use the Kubeflow service.
The attribute values for adding a user can be defined as follows.
parameter
Explanation
email
A value in a standard E‑mail format
hash
Bcrypt algorithm encrypted user password value, and you can directly input the hash value generated by the Bcrypt algorithm
Since the staticPasswords value in the configmap is applied when the Dex service starts, restart the Dex service using the following command.
Color mode
kubectl rollout restart deployment dex -n auth
kubectl rollout restart deployment dex -n auth
Code block. kubectl - dex restart
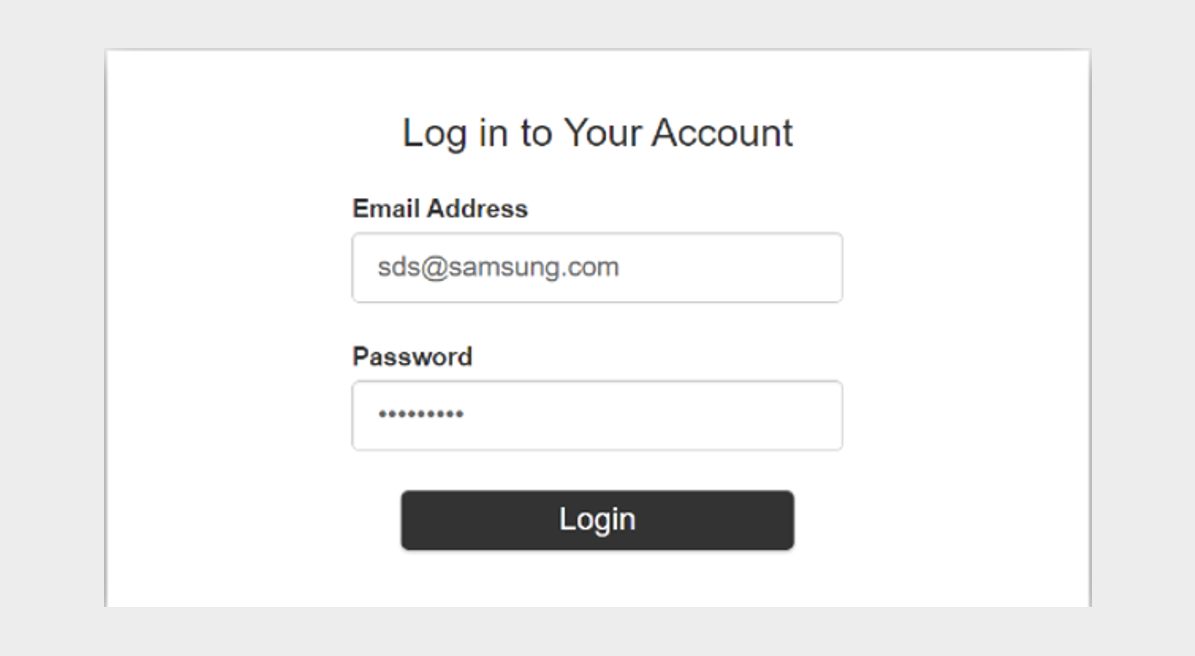
Attempt to log in using new user information.
New user information login
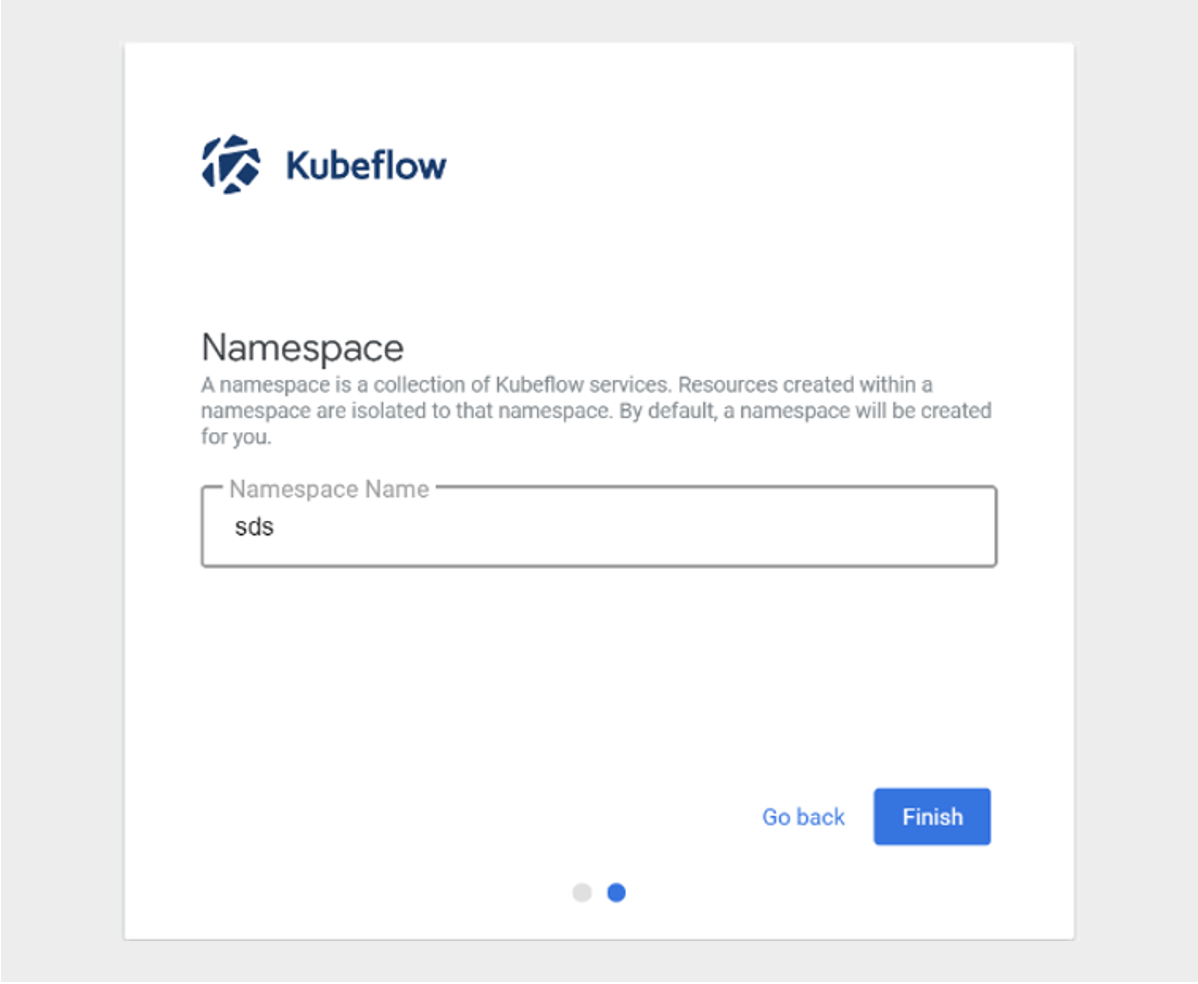
Verify that after successful login, it transitions to the screen for creating a new Namespace(profile).
Create Namespace Name
The above content was written with reference to the official Kubeflow site. For more details, see Kubeflow Profiles.
How to use Custom Image in Kubeflow Jupyter Notebook
To use a custom image in the Kubeflow Notebook Controller that manages the Notebook life cycle of Kubeflow, you must meet several requirements.
Kubeflow assumes that Jupyter will start automatically when a Notebook image is run. Therefore, you need to set the default command to start Jupyter in the container image.
The following is an example of what should be included in a Dockerfile.
Custom Image must be stored in a public registry such as Docker Hub or a private registry, and be push/pullable from Kubeflow.
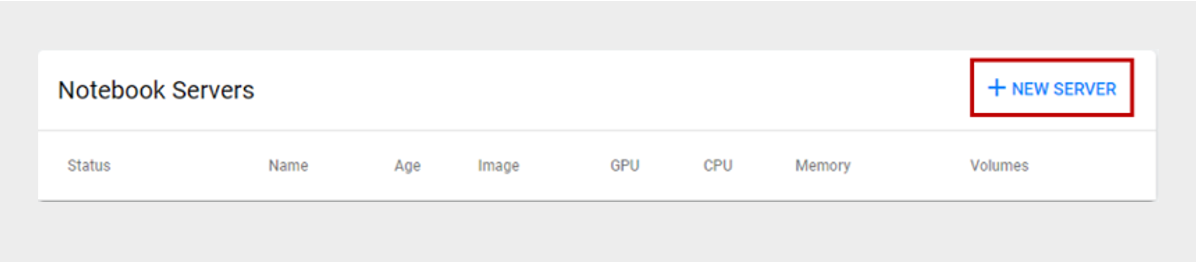
On the Notebook Servers page, click the +NEW SERVER button.
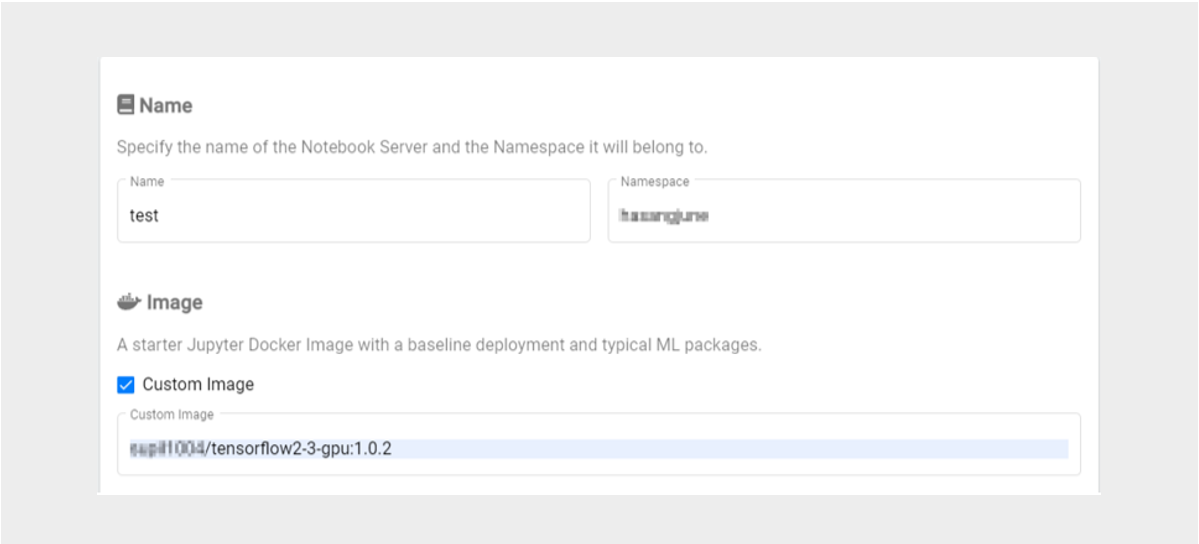
If you have created a Custom Image, check Custom Image on the Kubeflow Notebook Server screen and enter the Custom Image address to create a new Notebook Server.
Information
The above content was written with reference to the Kubeflow official site.